While it may seem difficult to monitor the presence of wildlife over large areas, it can be done with the help of artificial intelligence. A detection model capable of recognizing animals can be extremely useful for several reasons:
-
Wildlife conservation - monitoring wildlife populations is essential for conservation efforts. By accurately detecting and identifying different species, conservationists can gather valuable data on population size, distribution, and behavior. This information helps understand ecological patterns, identify threatened or endangered species, and formulate effective conservation strategies.
-
Habitat monitoring - monitoring the presence of wildlife in specific areas helps assess habitat conditions. Using detection models, researchers and conservationists can gather data on animal movements, migration patterns, and habitat use. This information helps evaluate the effectiveness of conservation efforts, identify areas in need of protection, and understand the impact of human activities on wildlife habitats.
-
Ecological research - studying wildlife behavior and interactions is fundamental to ecological research. Detection models allow researchers to collect data on animal movements, social structures, and feeding patterns. This information helps to understand species interactions, ecological dynamics, and the overall functioning of ecosystems.
-
And much more!
In this tutorial, you will build a detection model that can detect wild animals. We will use 10 datasets from the Open Images Dataset, namely: bear, deer, fox, hedgehog, lynx, otter, rabbit, raccoon, skunk, and squirrel. To learn how to download them click here.
#Extend your data
After uploading the datasets, you may notice that the number of images in each dataset varies. This is where the dataset manipulator can come in handy. To extend the data, go to each dataset and select Dataset manipulator.
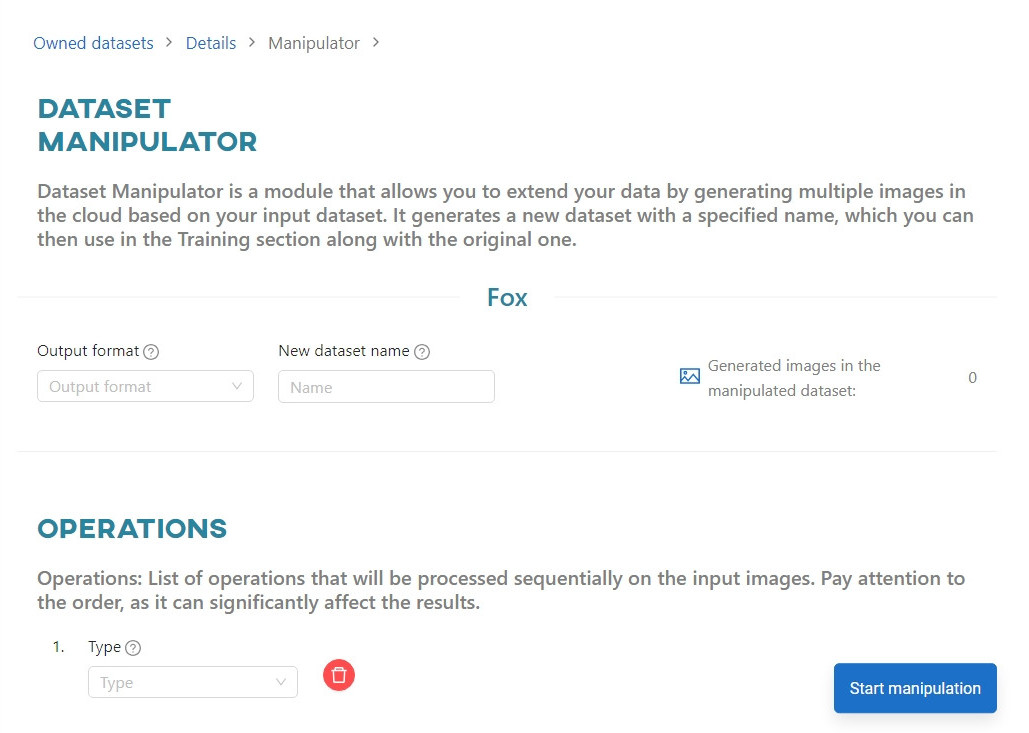
Set the output format to PNG and enter a new name for the dataset. In the operations section, add the operations of your choice. In the Generate up to field, we chose a different number for each dataset to get roughly the same number of generated images. Once the operations have been added, click Start Manipulation.
#Creating the model
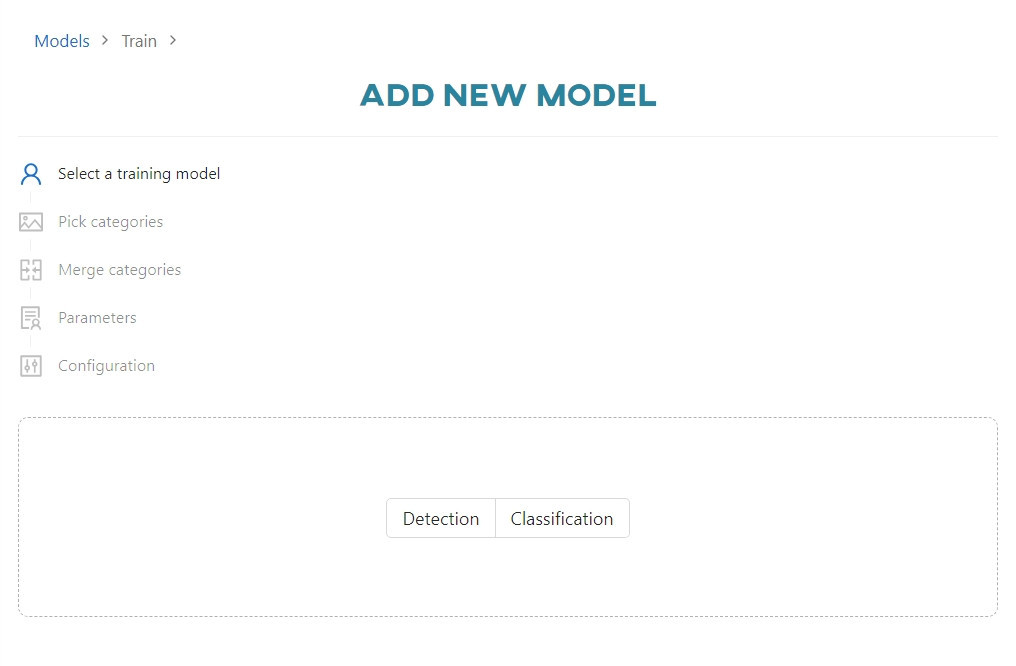
After creating new datasets, go to the Models section and click Add new model. Select Detection.
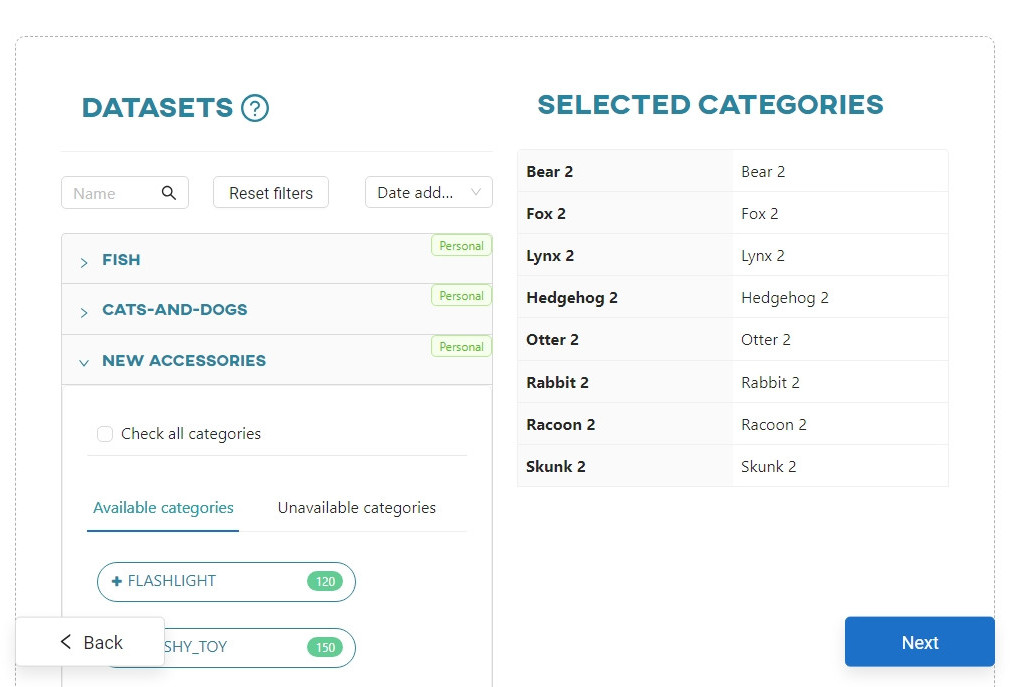
Select the datasets you want to use to train the model.
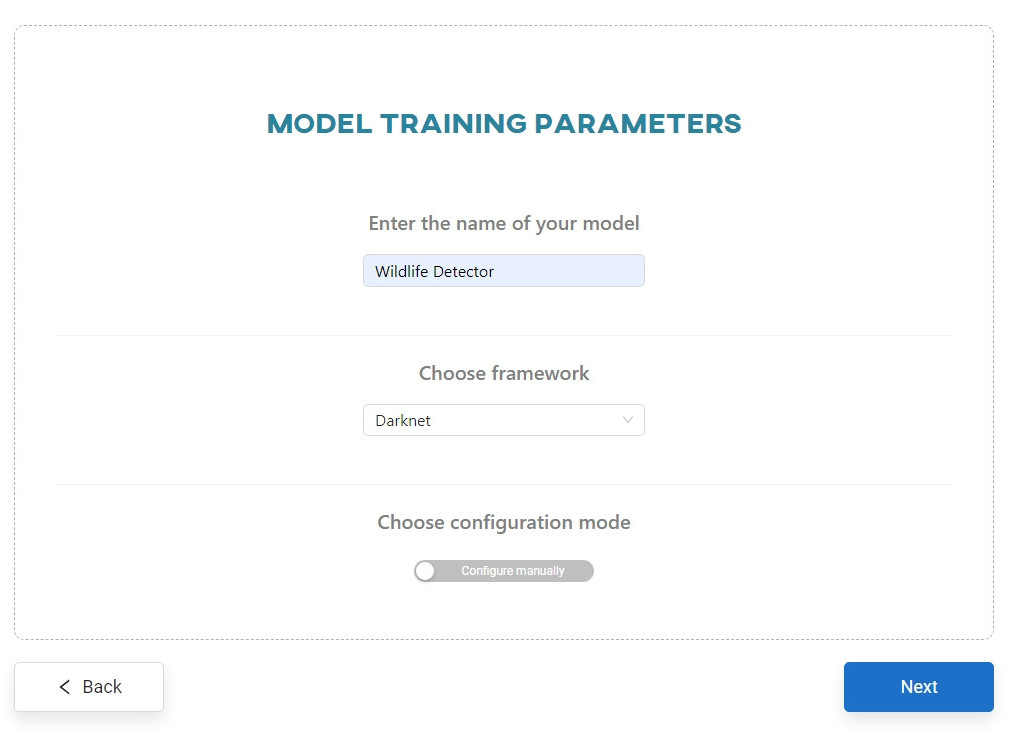
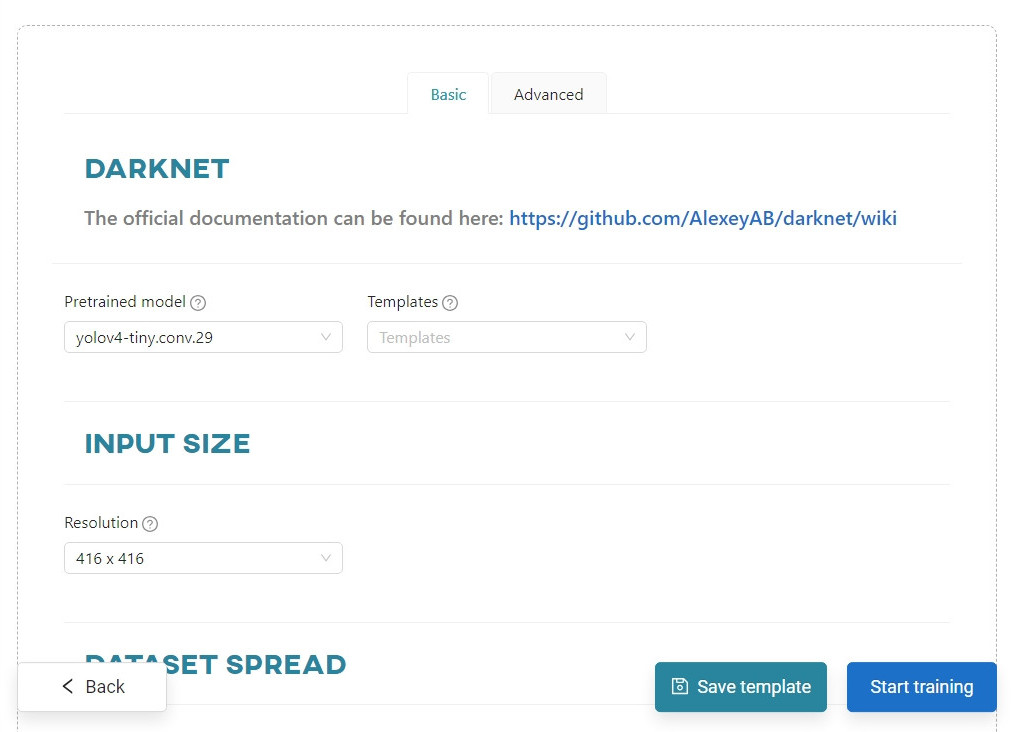
Skip the merge categories step and click Next. Enter the name of your model, select the Darknet framework, and enable the Configure manually option.
Change the pre-trained model to yolo4-tiny.conv.29, set max batches to 40000, and click Start training. You can view the training progress in the Dashboard view, in the Notifications tab, or in the Models section.
#Testing your idea
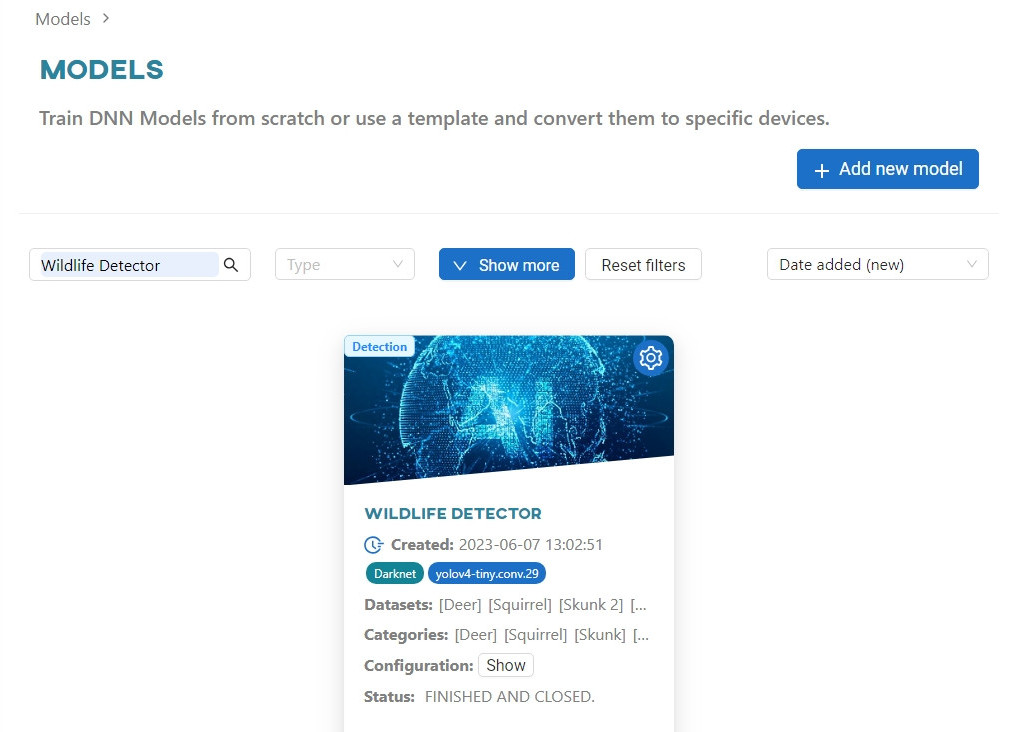
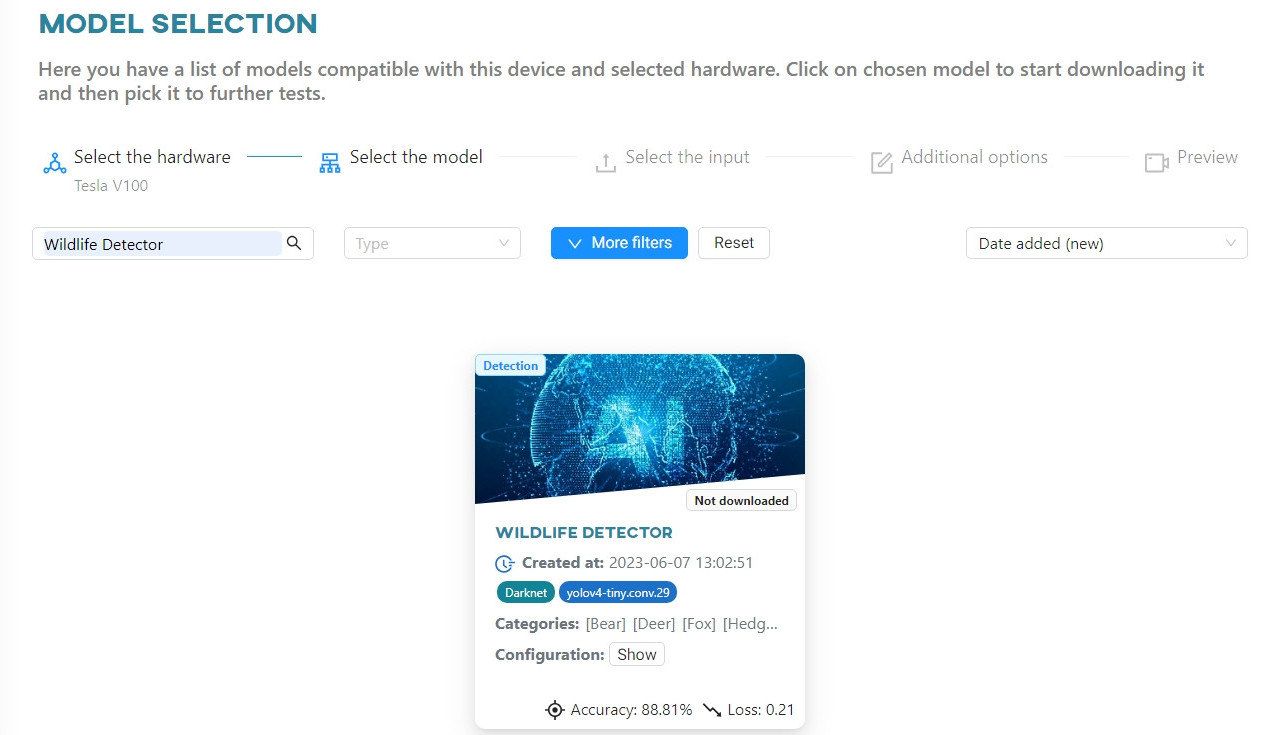
When the training is complete, go to the Models section and click on the Wildlife Detector model.
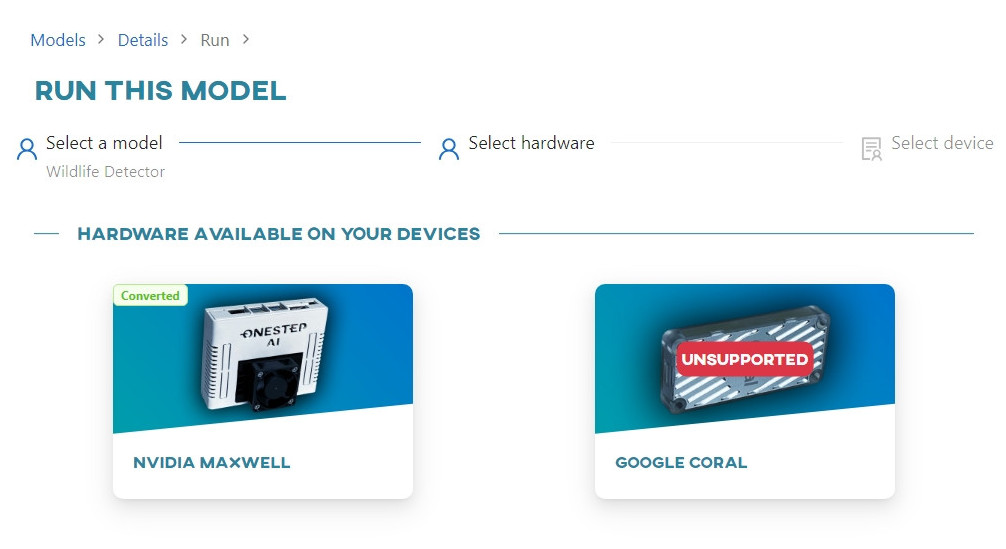
This time we will use the Tesla V100 hardware. Click the hardware tile to convert.
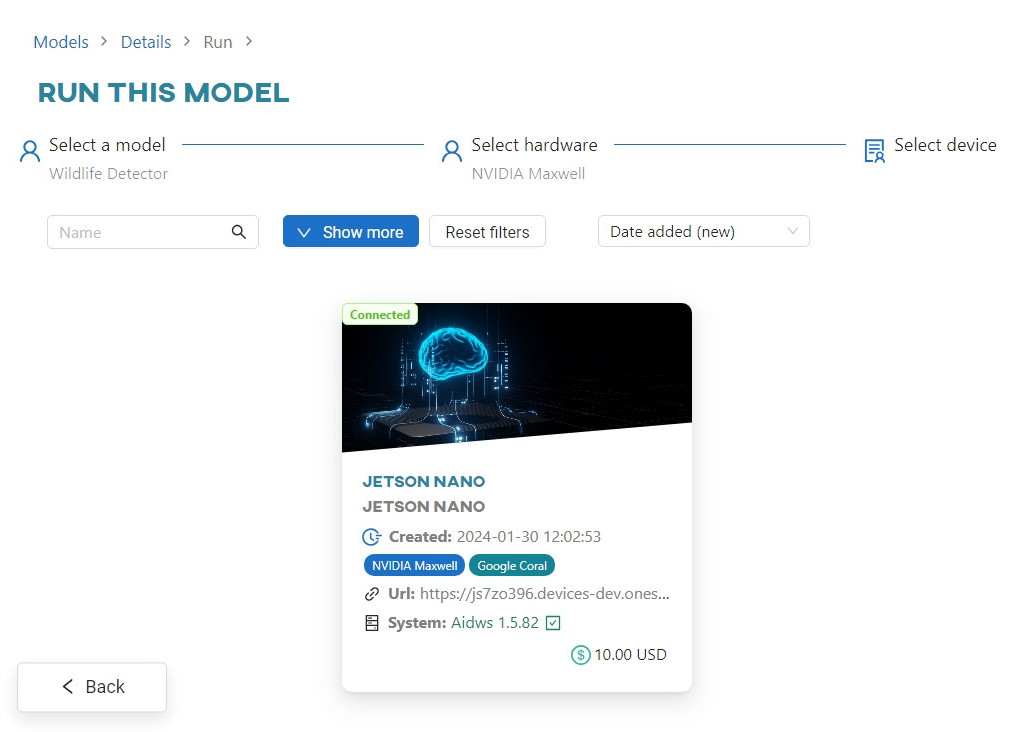
Once converted, click on the device to connect to it.
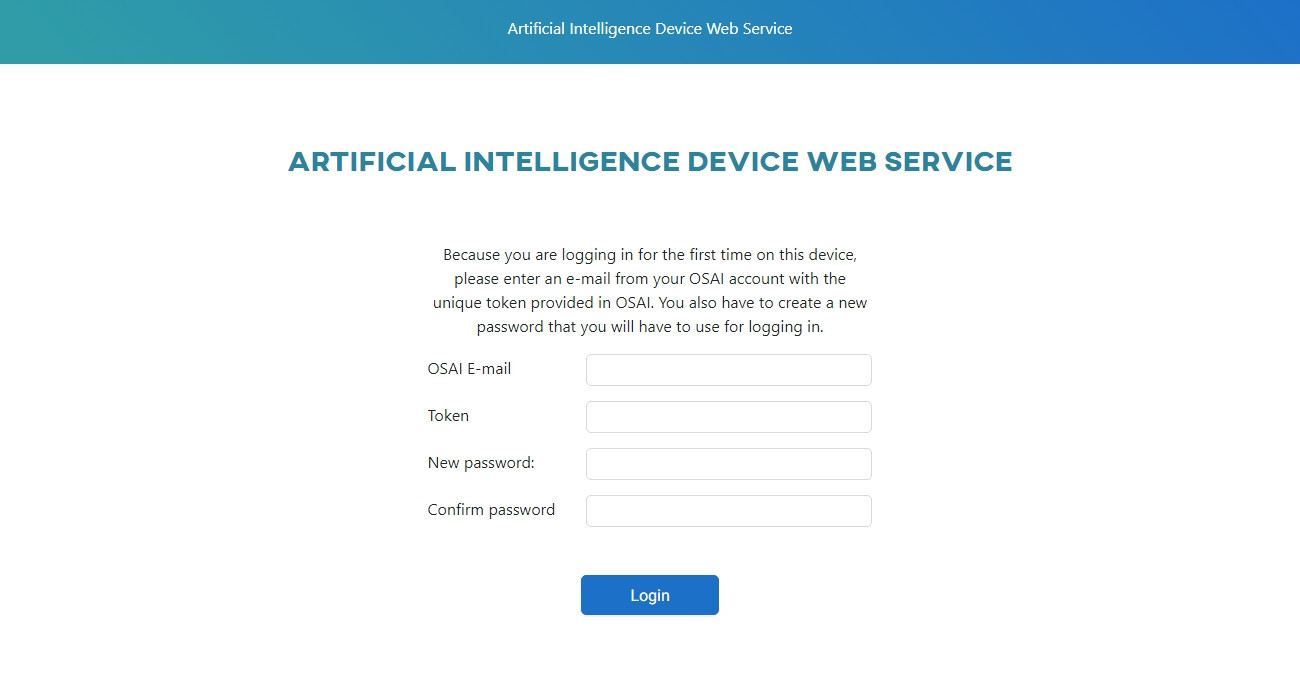
Copy the registration code to the clipboard, then click Copy token and go to device. This will open a new tab in your browser, where you will find a web app that is now using your local device.
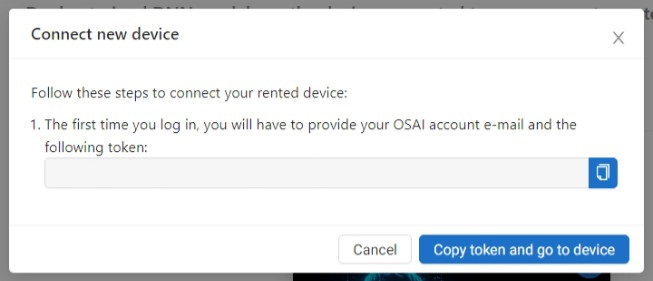
Enter your e-mail, paste your registration code into the Token field, and create a password. Once registered, the device will change its status to Connected in the Live Testing section of the OSAI app.
Select the Wildlife Detector model. To download it to the device's local memory, click on the model tile.
Click the Upload File button. You can upload either a photo or a video. For this tutorial, we will use video files.
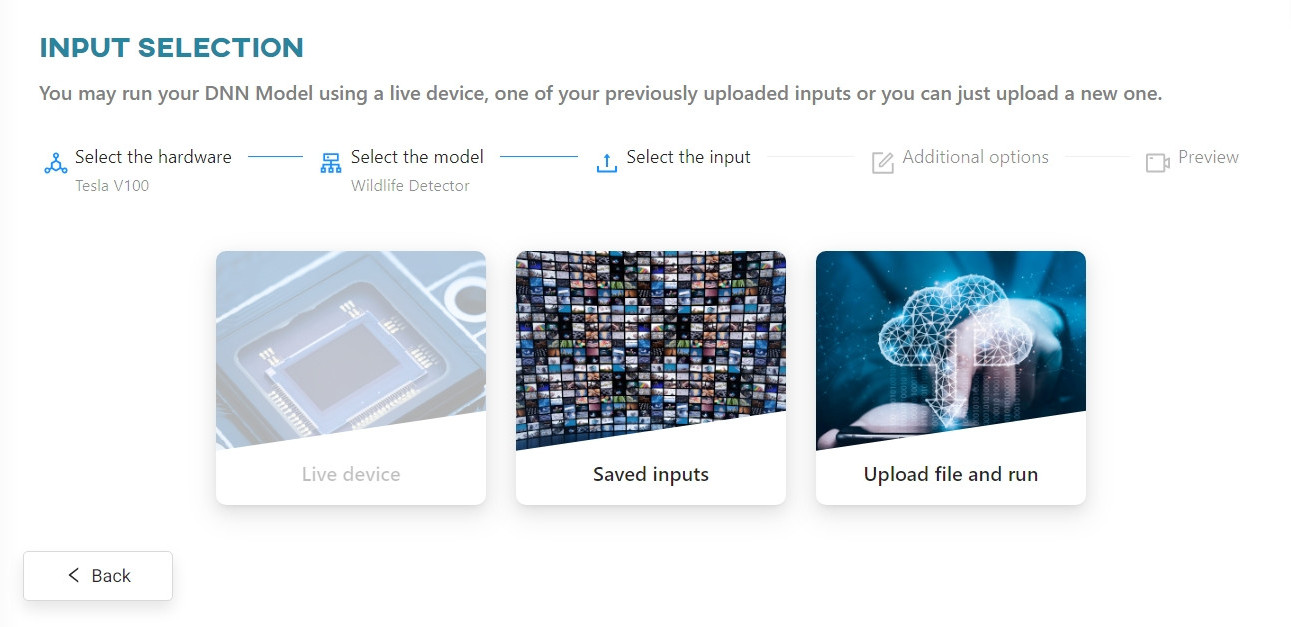
After uploading your video file, you can change its settings. This time, we have selected the Don't upload option. Click Next to continue.
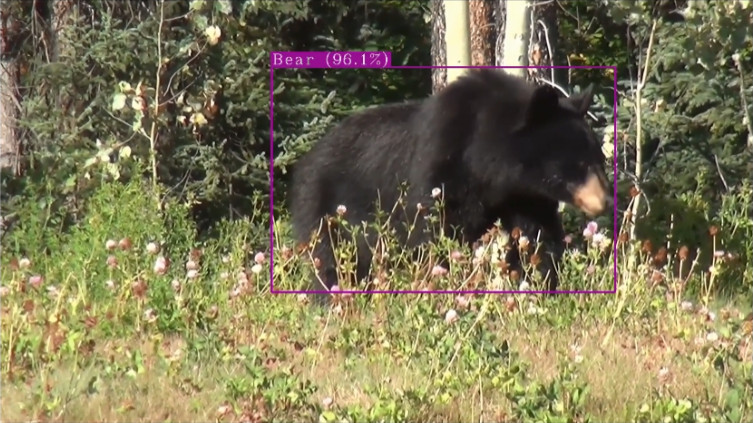
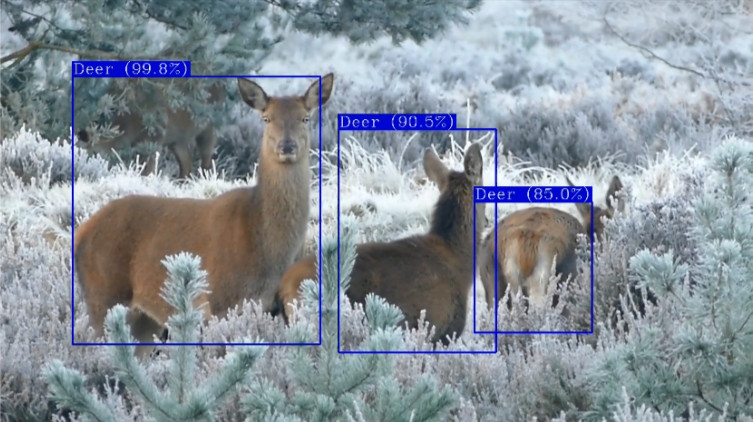
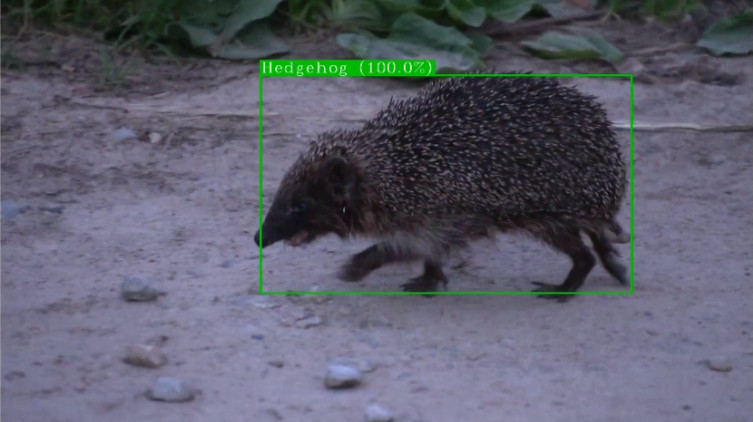
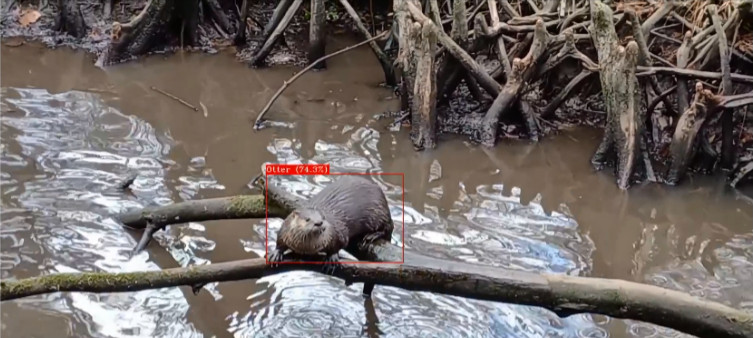
Once the video has been processed by the web app, you can view the results.
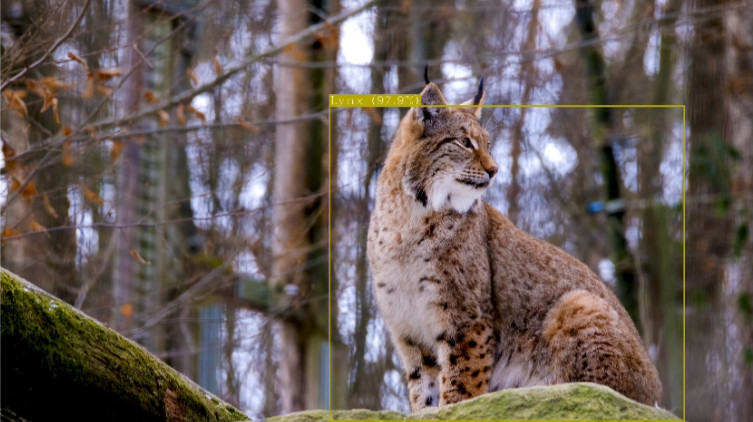
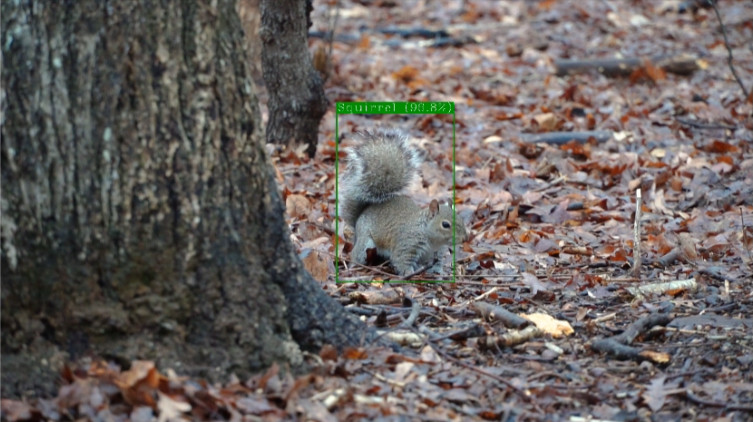
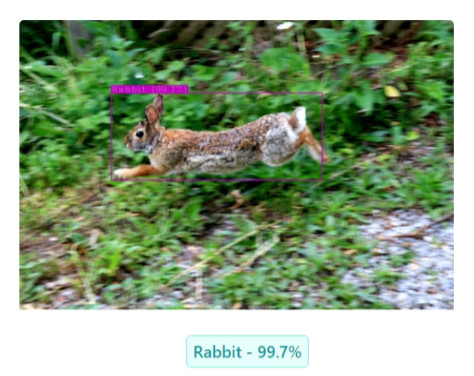
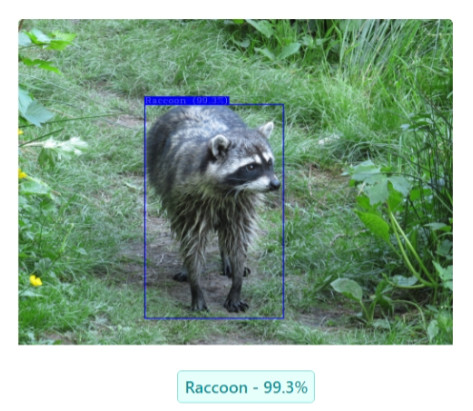
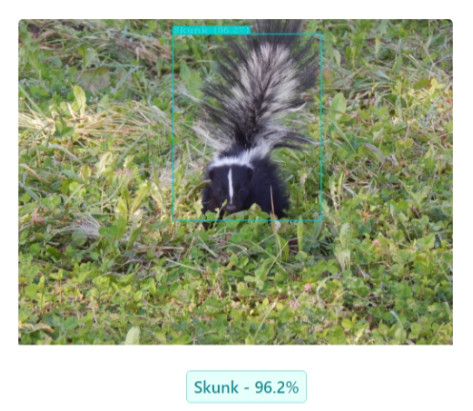
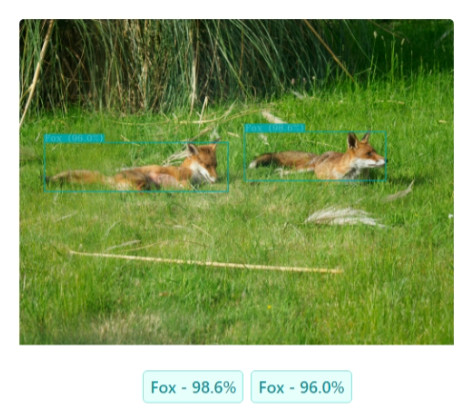
You can also test your model on uploaded images: