
1. Take multiple photos of the item from different angles and lighting conditions
To create a functional model, it’s important to show every angle of the item. The more photos you upload, the better the model will be able to recognize the item in different situations.
- Here are some tips for taking good photos for machine learning:
- • Use different lighting conditions. Take photos of the item in natural light, artificial light, and in different shadow conditions.
• Take photos from different angles. Take photos of the item from the front, back, sides, and top.
• Take photos with different levels of occlusion. Take photos of the item with other objects in front of it, behind it, and on top of it. - Additional tips:
- • Use a high-quality camera to take photos.
• Avoid blurry or out-of-focus photos.
• Make sure the photos are well-lit.
• Crop the photos to remove any unnecessary background.
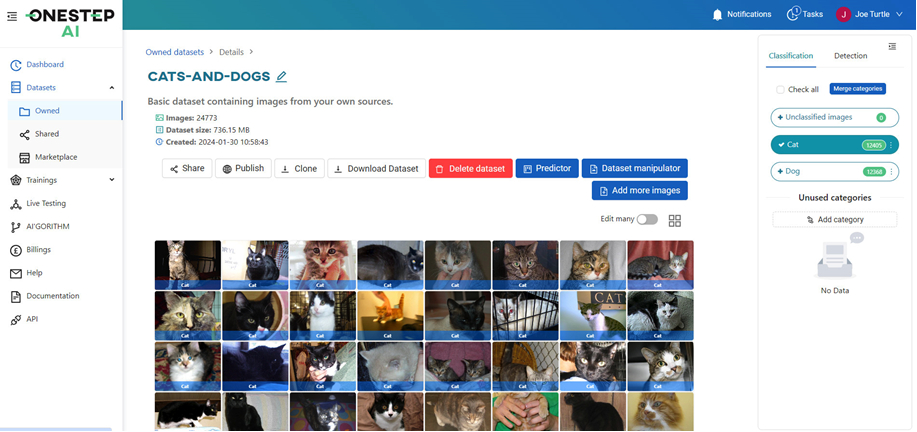
2. Label your photos with bounding boxes
Once you have taken photos of your item, you need to label them with bounding boxes. Bounding boxes are used to identify the objects in the photos.
To label your photos, you can use our labeling tool. The labeling tool is a simple and easy-to-use tool that allows you to add bounding boxes to your photos.
To add a bounding box, simply click and drag around the object you want to label. Once you have created a bounding box, you can type in the name of the object.
Here are some tips for labeling your photos:
• Be as precise as possible when creating bounding boxes.
• Label all of the objects in the photos.
• Use consistent names for the objects.
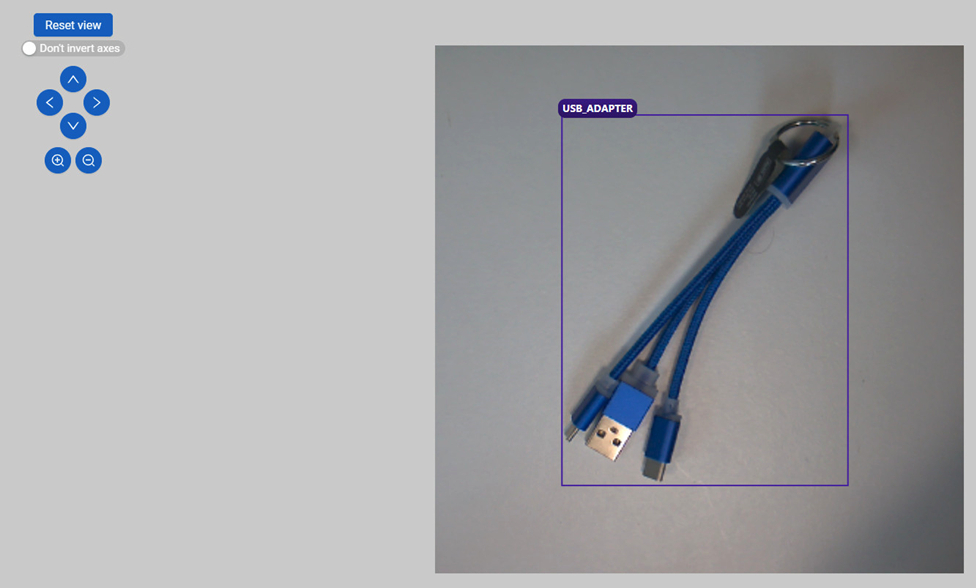
Here are some examples of labeled photos:

Data augmentation
After you have labeled your photos, you can use our data augmentation tool to expand your dataset further. The data augmentation tool will create more photos of your item with different angles, lighting conditions, and levels of occlusion.
This will help you to create a more robust model that can recognize your item in a variety of situations.
To use the data augmentation tool, simply select the photos you want to augment. The data augmentation tool will then create new photos of your item with different angles, lighting conditions, and levels of occlusion.
3. Train Your Model Effortlessly with Built-in Guidance
With your data labeled, you're ready to train your model! We make this process smooth and accessible, even for beginners. Here's how it works:
Built-in Training Guide and Templates:
Forget complex coding or wrestling with framework choices. Our app provides a guided training experience with built-in templates. These templates offer pre-defined configurations for common tasks like object recognition, making it easy to get started.
The step-by-step guide walks you through the training process, simplifying tasks like:
• Uploading your labeled dataset.
• Selecting the appropriate AI framework based on your project needs (ONESTEP AI will recommend options based on your data and goals).
• Adjusting key training parameters for optimal performance.

Seamless Hardware Recommendation:
Training a model can be resource-intensive. Don't worry about choosing the right hardware! We analyze your project and recommend the most suitable hardware options, whether it's leveraging your local machine's capabilities or suggesting cloud-based solutions for larger datasets.
This ensures efficient model training without overwhelming your system or requiring expensive hardware upfront.
With these features, training your model becomes an intuitive and manageable step in the process, allowing you to focus on the insights your AI can deliver.
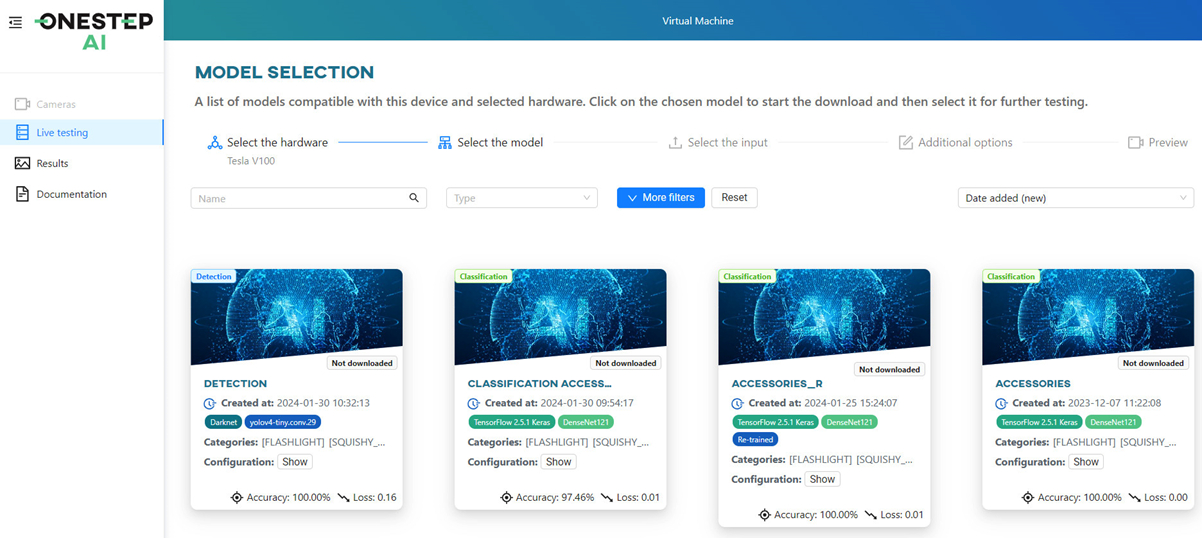
4. Evaluate, Refine, and Deploy Your Model
Once your model is trained, it's time to see how well it performs! ONESTEP AI provides powerful tools to help you evaluate, refine, and ultimately deploy your model:
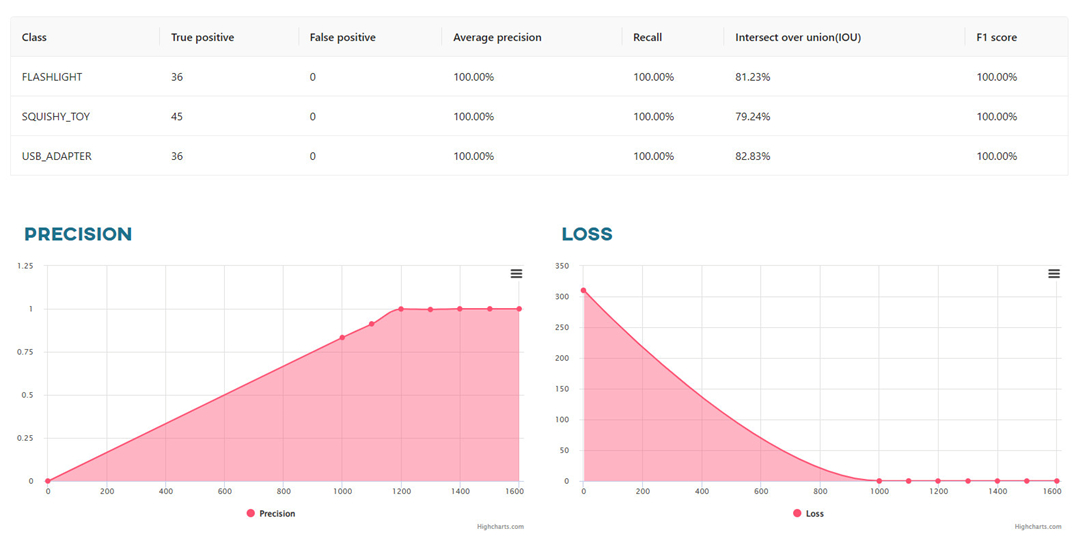
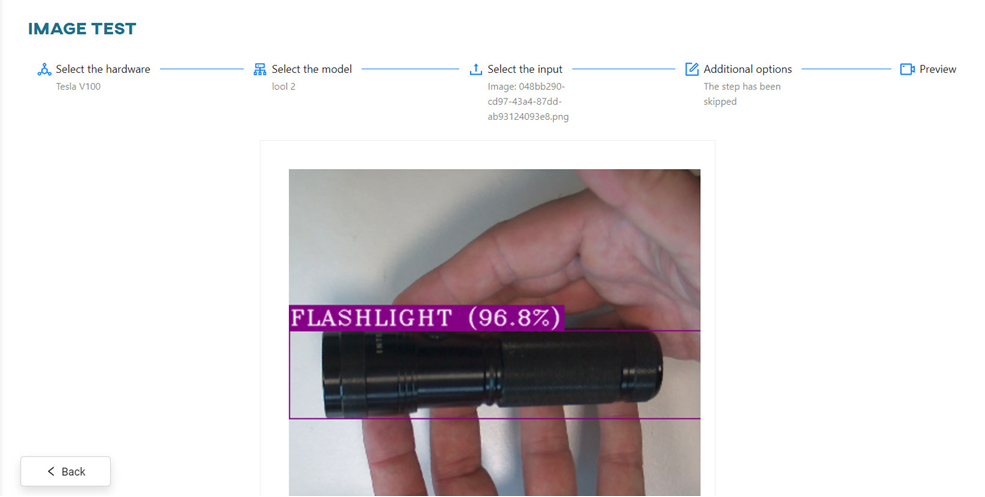
Comprehensive Evaluation:
Test your model's accuracy using a separate dataset it hasn't seen before. This helps gauge its ability to generalize and perform well in real-world scenarios. ONESTEP AI provides clear metrics and visualizations to analyze your model's performance.
Effortless Refinement:
If the initial results aren't ideal, don't fret! ONESTEP AI empowers you to refine your model with ease. Based on the evaluation results, you can:
• Retrain the model with adjustments to hyperparameters or training data.
• Leverage ONESTEP AI Cloud to rent different AI processors and test which one delivers the most efficient performance for your specific model. This "rent-to-test" approach allows you to find the optimal hardware configuration without upfront investment.
Flexible Deployment:
Once your model is refined and performing well, it's ready for deployment! Here's where ONESTEP AI's versatility shines:
• Convertibility: Our app allows you to convert the trained model to different hardware formats, ensuring compatibility with various deployment environments. This flexibility lets you seamlessly integrate your model into your existing infrastructure.
By combining evaluation tools, effortless refinement options, and hardware conversion capabilities, ONESTEP AI empowers you to not only build but also optimize and deploy your machine learning model with ease.